
|
|
The following instructions are a step-by-step guide to creating mosaics using stained glass. These steps can be applied to any mosaic project.
This guide was designed for the beginner stained glass artisan with minimal stained glass experience. Readers who are familiar with stained glass work may want to skip certain sections dealing with elementary issues.
If you have never tried mosaic work you will find it very enjoyable. It can be as easy or as difficult as you wish depending upon the project you choose. Every mosaic piece you create will not only be beautiful but completely unique as well. No two mosaic pieces are alike and you are limited only by your own creativity. Good luck and remember to have fun.
Mosaic Tools
Glass Cutter
Cutters can be purchased with or without
an oil reservoir. Cutting heads are replaceable.
 |
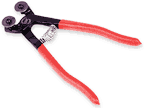
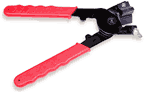
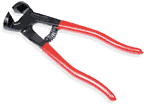
Running Pliers
Running Pliers derive their name from their
unique curved jaw design which separates scored glass with incredible ease.
Position the jaws at the end of the score line and squeeze. The curved
jaw exerts equal pressure on each side of the glass score until the glass
breaks cleanly. Great for stained glass.
 |
Glass Nippers
This spring-loaded, carbide wheel cutter
is specifically designed for glass mosaic work. Using two cutting wheels,
one that applies pressure from above and another from below, it's great
for making geometric and random sized shapes.
 |
Tile Cutter
This professional grade cutter with tile
separator is essential for scoring, cutting and snapping ceramic tile up
to 6" square and 1/4" thick. The tungsten carbide cutting wheel provides
precision scores.
 |
Tile Nippers
A unique, spring loaded cutter specifically
designed for mosaic work. Applies pressure from above and below, and quickly
nips tile into geometric shapes. A great time-saver for the mosaic art
enthusiast.
 |
Plastic Flexible Spreader
Used to spread your mosaic adhesive as well
as spread grout. These can be found in the auto body section of Walmart
or K Mart or in a hardware store.
Scrub Sponge
Used to scrub excess grout off of your stained
glass and tile pieces. Last step in the mosaic process. Available
in the grocery store or Walmart.
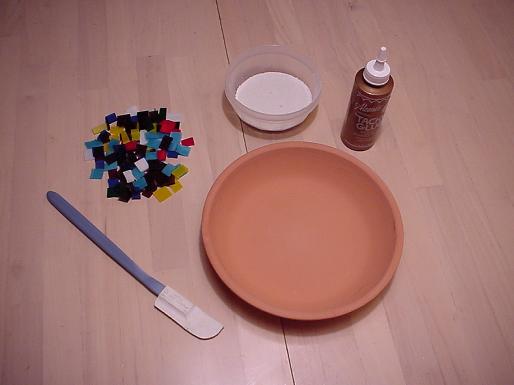
Please note that of the above listed tools, all you have to have are glass cutters, running pliers, mosaic cutters, a flexible plastic spreader and a scrub sponge. If you are using precut glass pieces like those included in this kit you only need the spreader and the scrub sponge.
Mosaic Components
Recommended Mosaic Adhesives/Glues
Surebonder FPC 9000
Weldbond glue
ProBond Adhesive
Elmers Glue All
This kit includes enough adhesive for several small projects.
Colored Grouts
You can either purchase mosaic grout at a stained glass or hardware store or you can mix your own from scratch.
A small bag of white grout along with mixing instructions is included with this kit. It is enough to grout at least one small project.
Making your own colored Grout
If you currently make your own stepping stone cement using our formula then you already have the basic ingredients for mosaic grout. The formula for colored grout is as follows:
White Portland Cement
Fine white sand
Acrylic Admixture (available at hardware
stores)
Powdered or liquid cement color
Mix 1 part white Portland cement with 2 parts fine white sand. Stir in acrylic admixture in place of water. Once your mix is about the consistency of thick pancake batter, mix in color a little at a time until the desired color is achieved. Remember that red, yellow and blue can be mixed in different ratios to create almost any color.
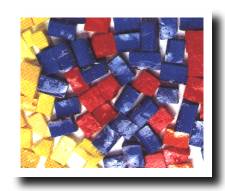
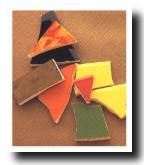
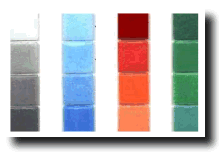
Stained Glass
Last but not least is your stained glass.
You can purchase stained glass at any stained glass supply store or at
the Hobby Lobby. If none is available in your area you can order
it over the internet. Another alternative is to buy clear glass,
paint it with glass paint and then cut it into mosaic pieces.
 |
 |
 |
The precut glass pieces provided with this kit should be enough for at least one small project.
GETTING STARTED
The process of making mosaics is actually very simple and consists of just a few simple steps. These steps are as follows:
1. Pre-planning your project
2. Choosing your design
3. Laying out your design
4. Cutting your mosaic pieces
5. Gluing down your glass
6. Applying grout to your project
7. Removing excess grout & cleaning
up
The following examples are done without a pattern. If a pattern was to be used it would be traced onto the inside of the ceramic bowl and would guide the placement of the mosaic pieces.
 |
 |
 |
 |
 |
 |
 |
 |
Pre-planning your project
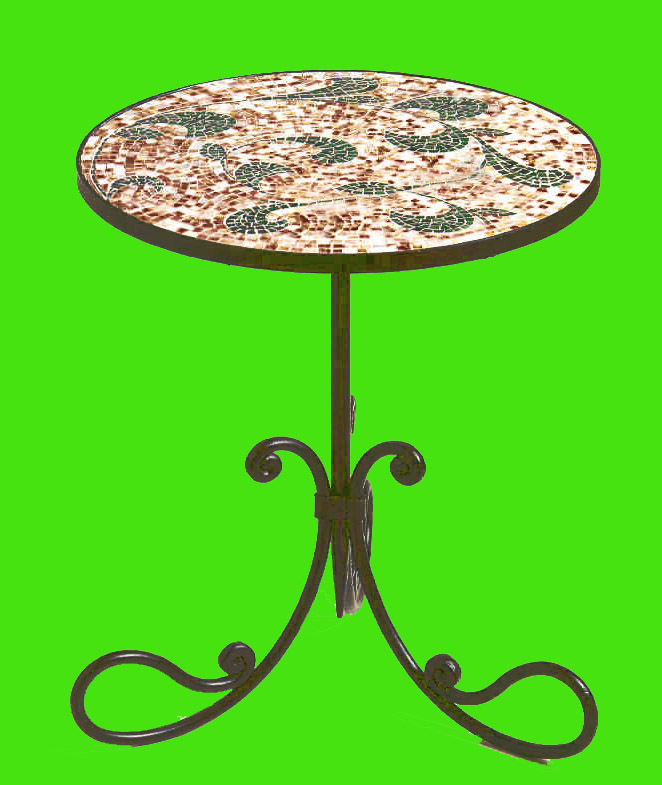
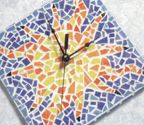
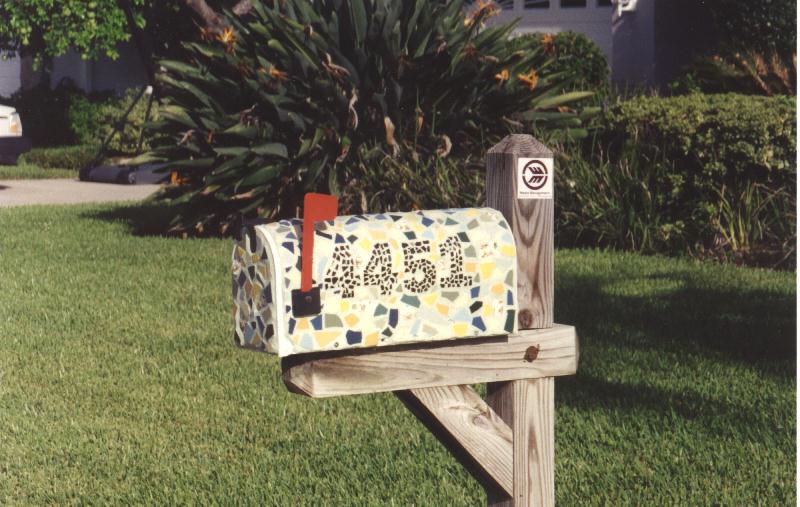
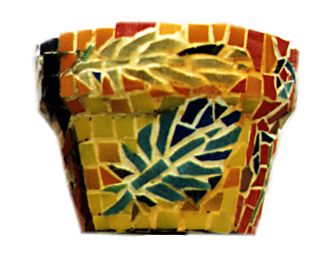
You will first need to decide what you are going to apply your mosaic glass to. This object is referred to as the project surface. It can be almost anything that is solid and that glass will adhere to. Flat surfaces are easiest to work with but rounded surfaces can be used as well. Beginners should start with something simple such as a solid pot holder or a stepping stone. Once you are experienced you can apply mosaic glass to stepping stones, bird baths, garden benches, mail boxes, picture frames, clocks, front porches, walls, floors, pool steps, border stones, bird houses, bricks, and many, many other surfaces.
Choosing your design
As with any work of art you must first decide what design or pattern you are going to use. Almost any stained glass pattern will work for mosaics and there are thousands of patterns to choose from.
You also have the choice of drawing your own pattern on a piece of paper or drawing a pattern directly on the project surface. In any event, using a pattern will give you better results as far as the look of your finished product and will make it easier to place your mosaic pieces.
If you choose to use what we call the freestyle or random layout method, you should at least use a picture or drawing of the design you are trying to create as a reference.
Laying out your design
There are two methods of mosaic application, direct and indirect. Both are outlined below and each method has its advantages.
Direct Method - The direct method involves tracing or drawing the pattern onto the project surface and then gluing the pieces onto that surface using mosaic glue.
If the project surface is flat then carbon paper can be used. First take a piece of carbon paper and lay it onto the project surface. Then take your pattern and lay it over the carbon paper. Using a pencil, trace the pattern onto the project surface. If necessary, when you are done, take a marker and go over the carbon outline until it is clearly visible
If the surface is such that the pattern cannot be transferred with carbon paper then the pattern must be drawn by hand onto the surface. If possible use a ruler or flexible tape measure.
For example, if you were laying out an irregular shaped flower pot or vase and were planning a simple side by side tile design you would take a ruler and draw grid lines every inch or so as a guide. If you were going to integrate a 3" x 3" rose pattern in your design you would use a pattern and carbon paper for that portion.
The direct method is used for horizontal surfaces and is nice in that once the pattern is traced onto the project surface you can glue one piece at a time taking all the time you need.
Freestyle or random placement is only recommended on very small pieces where the design is simple. Whenever possible, especially on intricate designs, use a pattern.
Indirect Method - The indirect method utilizes clear contact paper which is laid over the pattern with the sticky side up. The glass pieces are pressed onto the contact paper using the underlying pattern as a guide. When laying out your design, make sure you leave a 1/8 inch gap between pieces for your grout.
This method is useful for vertical surfaces like walls. Since the pieces are attached to the contact paper they can be glued vertically without pieces slipping. The disadvantage to this method is that all the pieces will be applied at the same time which is a little tricky.
Applying the glass using this method is discussed below.
Cutting your mosaic pieces
To create your glass mosaic pieces you will first create a long glass strip and then cut that strip into squares using either a glass cutter and breaking pliers or mosaic cutting pliers. Once you have your glass strip cut the mosaic cutters are the easiest to use to produce the final glass shapes for your project. Using the mosaic cutter you can turn a strip of glass into squares, rectangles and triangles in a matter of seconds.
To make a glass strip you will first mark the glass piece using a ruler and a glass marker. You can make the strip any width you desire. Once the glass is marked you will score it. If you perfer, use your ruler as a straight edge for fast and consistant score lines.
Scoring your glass: Standing in a comfortable position, hold the cutter like you would a pencil and keep it perpendicular to the glass. Starting at the edge of the glass closest to you, place your cutter head on the glass approximately 1/8" away from the edge. Apply light, even pressure to the cutter. Guide the head across the surface of the glass on the inside edge of your traced line and off to the other side of the glass. One even score is all it takes; don't rescore over your line or move your cutter back and forth while scoring. This will result in a bad breaking score and it will also chip the wheel of your cutter.
Look at your score line. Are there small flakes of glass popping up from the score line? If so, you are applying too much pressure on the cutter. With your next score, lighten up a little bit. Are you unable to see where your score line is? Not enough pressure is being applied, so try again pushing down a little harder. A white score line is called a dry score. If this happens, add oil to your cutter.
After scoring your glass, you will need to break it. There are two ways you can achieve this when cutting a narrow strip. You may use running pliers, or breaker/grozer pliers. Always remember to break each score line right away before making the next score. The fastest way to wear our your cutting wheel is by scoring over other score lines.
Breaking glass with running pliers: Hold
the glass with score side up. Position the pliers at the beginning of the
score and match up the line on the top of the pliers with the score. Tighten
the screw until it touches the lower jaws of the pliers, then loosen the
screw a 1/4 turn. Gently squeeze the running pliers to run the score. If
the score only runs part of the way, you can turn the glass and repeat
the process from the other end.
Breaking glass with breaker/grozers: Hold your glass in the hand that won't be holding the pliers. (If you are right handed, hold the glass in your left hand or vice versa.) Form a fist with your thumb on the top of the glass and your fist under it. Your knuckles should be adjacent to the score line. Position the breaker/grozers (with the flat jaw on top) directly across from your knuckles and parallel to the score line. Hold the glass firmly and apply even pressure while snapping up and away. This is the same motion used in breaking glass with your hands.
If your score breaks unevenly, clean up the ragged edges with breaker/grozer pliers. With the flat jaw facing up, grasp small pieces with the pliers and snap them off. If the pieces are too small, hold the pliers at a 90 degree angle to the edge of the glass and drag the serrated jaw of the pliers across the edge. If you still have jagged edges on the glass, you can use a glass grinder to shape and smooth these edges. Continue to score and break all of your pattern pieces.
After cutting your strip of glass you can make your mosaic pieces using one of two methods.
You can score the strip into squares or triangles or rectangles and break them using the method above.
or
You can purchase mosaic cutters and cut the
strip into pieces more quickly. To use the cutters you simply place
the cutter over the glass with the glass sitting between the two wheels
and squeeze the cutter handles.
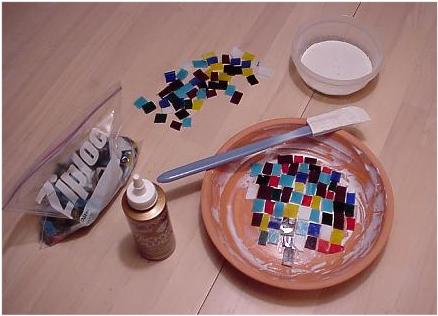
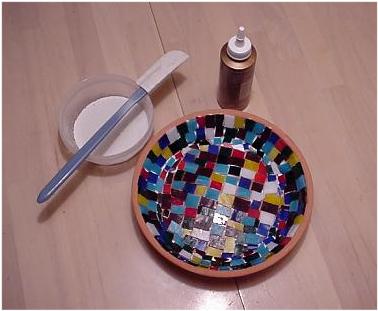
Gluing down your glass
Direct Method - There are several different types of glue that can be used for mosaics. (several are listed in the materials section above) The glue you use should be compatible with glass, should be waterproof when dry, and should dry clear so that it won't show through the glass and so that it won't cover up your pattern lines when first applied. For horizontal surfaces it is not necessary for the glue to dry fast but in more vertical applications a faster drying glue is a must.
Using a glue spreading tool, apply a layer of Mosaic Adhesive onto the project surface. (TIP: Be careful not to over apply your glue. If you fill in the areas between the pieces with glue there will be no room for your grout.) Carefully place your mosaic pieces onto the project surface making sure to leave a 1/8 inch gap between pieces. Firmly press each piece in place. Work within a small area at a time for best results. Once all the pieces are in place allow the adhesive to fully set before proceeding. Once the pieces are set you are ready to go on to the next step.
Indirect Method - This method is useful when applying mosaics to vertical surfaces like walls. For this type of application it is best to use a fast drying glue. When the glass is in place on the contact paper the mosaic adhesive is applied to the project surface as well as the glass pieces. Carefully pick up the contact paper which now holds the glass and gently apply it to the project surface. Press the pieces in place and let the glue set for 5-6 hours. Since the contact paper holds the design together it is easier to get the glass to adhere as one design. On vertical surfaces the edges of the contact paper can be taped down to keep the design from sliding.
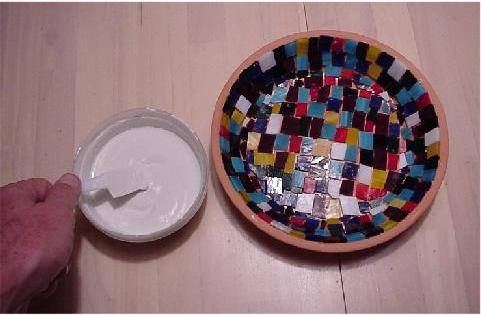
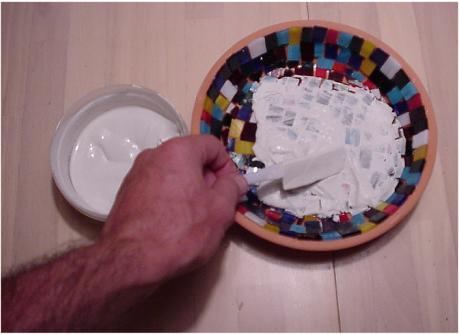
Applying Grout to your project
Mix up a batch of grout and using a grout applicator tool, spread it onto the tiles. (TIP: Auto body repair stores carry a great selection of spreading tools that are perfect for spreading grout.) Work the grout into the crevices until the grout is smooth and level with the tile surface. After using the spreader a paint brush can be used to work the grout thoroughly into all the crevices.
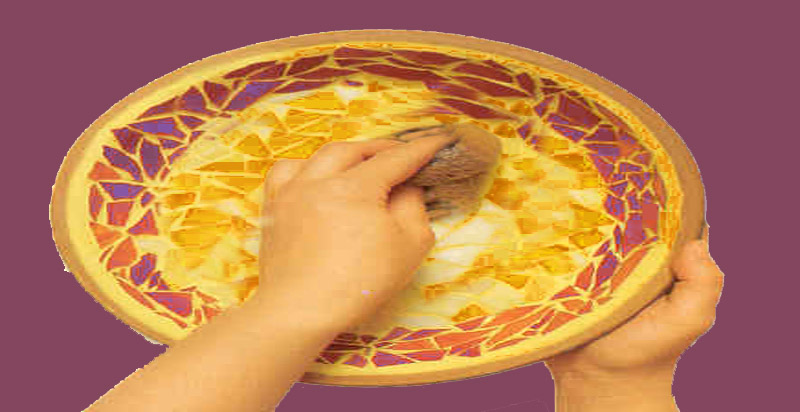
Removing excess Grout and cleaning up
After the grout has partially dried, wipe off the excess with a damp scrub sponge. When the grout has thoroughly dried, polish the tile surface with a damp paper towel or sponge until tiles are shiny and free of grout residue.
Congratulations! You're ready to use and
admire your new mosaic masterpiece.
Pricing and Selling your Work
Pricing (taken from an article on Pricing Crafts)
Before you can market your product, you must determine what your pricing structure will be. You need to establish a wholesale and retail price if you plan to do both. Wholesaling is only worth your while if you can produce and sell in volume. Garden Centers would probably love to purchase your work wholesale and make 30% on their money plus please their customers but they need a good supply. If you retail you have to figure in your time and the cost of retail space whether it is at a flea market or a craft show. If you consign you have to figure in 20% for the store owner.
The bottom line is that your product must be priced to sell and if you have kept your per item cost down, you should have no problem making a good profit whether wholesaling or retailing.
If you are like a lot of other craftspeople, you didn't start out in crafts with the intention of selling. First you made things for yourself, then for family and friends, and then almost without realizing it you began selling a few pieces. At that point, you were not in the "business" of selling; that happened when you made a conscious effort to turn your craft activity into a profit-making enterprise;
There are two important questions to ask yourself before deciding to enter the marketplace:
Is my work good
enough in design and quality to compete in the crafts marketplace?
Can I produce efficiently
in sufficient quantity to make a decent profit?
If your market research shows there is a demand for your work, you must decide on a fair price for it. This is a serious problem for craftsmen - not only because of a lack of basic business skills but also because of social and emotional factors.
The making of hand-crafted objects has the status of a leisure-time activity in our society. One segment of the buying public believes that making the item gives you great pleasure, and uses time that would otherwise be wasted. You may contribute to this notion by not placing value on your time and talent.
The emotional factors that interfere with realistic pricing come from the close relationship that craftspeople have with their work. Sometimes this leads to overpricing or to the production of objects that have little demand in the marketplace.
It's important to recognize and deal with this emotional factor by realizing that price is not a judgment of you as an artist or craftsperson, but is a judgment of the cost of production and what the customer will pay.
Because of the design of the product, the quality of materials, and skill in craftsmanship, the product must appeal to a particular customer in a particular setting. You, the producer, must earn back the cost of your materials and overhead plus a reasonable profit.
For those of you who are independently wealthy, or philanthropists who can afford to subsidize the consumer remember that your selling practices threaten the existence of craftspeople who must sell to survive. You should always price your work as if you had to earn your living from its sale.
What do you want in return?
Take an organized look at the income potential you have as a craftsperson. You might start out something like this:
If I were working full-time in producing
crafts with no other income, my work week would be:
( )60 hours ( ) 50 hours ( ) 40 hours per
week. (Check one.)
With my skills, training, and special ability
(talent), I should be earning:
( )$25 ( )$15 ( )$10 ( )minimum wage per
hour. (Check one.)
This will give you a weekly income as a goal to maintain your chosen standard of living.
The other factors to consider are the number of units you can produce in the number of hours allowed and the market demand for your craft:
My production methods are developed to the
point where I can make:
( )10 units ( )5 units ( )2 units ( )units
per hour. (Check one.)
OR
( )1,000 units ( )500 units ( )200 units
( )units per week. (Check one)
Working through this exercise should help you determine if you can depend on your craft; maintain a satisfactory standard of living; or supplement your present income.
You may find that it is impossible to make a profit from your craft. If so, reevaluate your production methods or drop that particular item and develop a new line.
What's in a price?
The reason for a pricing system is to make a profit from your work. Profit depends on cost, selling price, and the number of items (units) you sell.
The best price is the one that will maximize the profits from your business. The price that sells the greatest number of units or brings in the most sales dollars is NOT necessarily the best price. This is because you may not realize a fair profit even with the sale of a substantial number of units and dollars earned.
Your price should: -Cover all production and marketing costs. -Make a profit. -Attract customers.
There are certain components in all pricing requirements. The combination of components will vary from craft to craft, but YOU MUST SATISFY ALL THE REQUIREMENTS.
These include:
Materials - every ounce of metal, clay, fabric,
or fiber.
Tools and equipment-purchase, maintenance,
depreciation.
Workshop space or rental.
Insurance.
Utilities.
Assistants, helpers.
Taxes.
Special fees, registrations, licenses.
Shipping to customers.
Office supplies.
Transportation to markets.
Bookkeeping.
Advertising.
Subscriptions to trade papers.
Membership in guilds.
Hourly wage.
Demand for skill and quality. etc.
How do you actually calculate a price?
Costs. The prevailing element when setting prices is costs. An accurate accounting of all of the costs that go into the craft business is necessary. In a business, the total costs to be considered include three factors: direct costs, labor, and overhead expenses.
Direct Costs + Labor + Overhead Expenses = Total Costs
These are the three basic or minimum factors that should be used for setting prices. The more exact the figures used for setting prices, the greater the chance for success.
Direct Costs -- Include all the materials, parts, and supplies that go into the actual production of the product or service. Direct costs should be exact, figured down to the penny.
Labor -- Includes all wages paid to employees. Many times, new business owners make the mistake of not paying themselves. Be careful not to fall into this trap. Labor costs are calculated by multiplying the number of hours worked by hourly wage. Be sure to include fringe benefits either in the hourly wage calculation or in overhead expenses. Fringe benefits can range from 15% on up, depending on the benefits included.
Overhead Expenses -- Include all the business costs not directly related to the actual production of the product or service. Overhead expenses include taxes, advertising, rent, office supplies/equipment, business-related travel, insurance, business permits, maintenance and repair of equipment, utilities (electricity, telephone, etc.), professional assistance (accountant, attorney, etc.), and any other costs related to the overall operation of the business.
A key concept to remember is that it is impossible to stay in business if prices are set lower than the "cost of doing business." Direct costs, labor, and overhead expenses are the bare minimum that must be reflected in the pricing strategy of any business.
Profit. Profit is the money left over after all direct costs, labor, and overhead expenses have been paid. In order to insure that there will be money left over, a profit factor or profit margin must be calculated in initial pricing. After the total costs are calculated, the profit factor is added to get the final price.
Total Costs + Profit = Price
or
(Direct Costs + Labor + Overhead Expenses) + Profit = Price
Generally adding a 15 to 20 percent (or more) profit margin is a starting point for most craft businesses. A mistake many home-based business owners make when first starting out is not adding in a profit margin to their pricing strategy. If this is not done, there will be no money for growth or expansion of the business.
Retail Pricing. Up to this point, the pricing formula will result in the wholesale price (the price you wholesale or sell to retailers who buy your product to sell in their retail stores). To arrive at the retail price for a product (the price the customer pays), a retail margin must be added, which is usually 2 to 4 times the wholesale price.
Wholesale Price x Retail Margin = Retail Price
or
(Direct
Costs + Labor + Overhead Expenses + Profit) x Retail Margin = Retail Price
The percentage a retailer adds to the wholesale price it pays for an item is called the markup. For example a product that is wholesaled for $10 (Direct costs + Labor + Overhead Expenses + Profit = $10), will be marked up at least 100 percent to a retail price of $20 (Wholesale Price x Retail Margin or $10 x $2 = $20). A retailer will markup items using the best pricing strategy developed for that business.
In some cases a wholesaler may also cross over and be a retailer at times. If this is the case, the wholesaler must be careful not to compete with or undercut their wholesale customers. For example, an artisan who wholesales pottery to gift shops and also sells the pottery directly to customers at art shows or craft fairs must be careful when it comes to pricing. The artisan should sell the pottery at retail prices at the art shows and craft fairs --- the same prices the gift shops charge. If the artisan retails directly to customers at a substantially lower price than the gift shops, the artisan will lose the wholesale accounts.
A word of caution to small home-based businesses that are wholesaling to retailers or selling to retailers through a distributor or "sales rep." Many times a retailer will ask for discounts when buying in bulk and distributors will ask for a percentage of what they sell. Both of these are overhead "costs" that must be incorporated into the original pricing formula.
In summary, the primary purpose of operating a craft business should be to make a profit. Prices should be established from an accurate accounting of direct costs, labor, overhead expenses, and profit margin. Pricing is a skill that must be developed and continuously monitored in order for a business to be successful and profitable.
Selling your Stained Glass Pieces
There are several ways of marketing your stained glass pieces once you have created them.
Flea Markets
Craft Shows
Fairs & Special Events
Consignment Shops
Wholesale to retail stores
Retailing your work through Craft Shows, Fairs & Flea Markets
Craft fairs are one way craftsmen have to sell their crafts. It is important to understand all of the issues associated with selling at craft fairs before deciding to do so.
Cost of Fairs
Sales made at craft fairs are retail sales - that is, you receive 100 percent of the selling price. But how much of that is actually profit? What must be considered is the cost of the booth, commission and/or registration fees as well as travel costs, overnight lodging, display props, among other things.
Depending on the fair, you might pay a booth fee or a commission. Some fairs have both. Booth fees vary from five dollars to hundreds of dollars, and commissions vary from 5 to 50 percent of all items sold at the fairs and orders taken while at the fair. On top of these fees, some fairs require a jurying or registration fee.
Juried Versus Nonjuried Shows
In a juried show, participants are asked to submit examples of their work via slides or photographs. A panel of judges then selects the work of craftsmen that best fits into the format of the fair. This ensures that high-quality items are sold at their fair. Shows that are not juried may include church bazaars and a variety of other community "arts and crafts" celebrations.
Although both have their place, good quality, high-priced items may sometimes be difficult to sell at nonjuried shows.
Advantages and Disadvantages
One of the best advantages of selling at a craft fair is that you receive 100 percent of the selling price even though part may be lost to the commission and/or booth fee. Other advantages are:
Because you are selling directly to the public, you meet the people who are buying your items.
You can test market new items.
You can test prices.
You can gain confidence in selling and meeting the public.
You can enjoy the festive atmosphere of the fair.
You meet people who can help you with your business.
You meet craftsmen who can give you support.
You can take orders for specialty/custom work.
The major disadvantage of selling through craft fairs is that it takes away from production. While you are selling, nothing is being produced. Other disadvantages are:
Fairs can become expensive when all expenses are considered.
Fairs can become boring when slow.
Information given at fairs can get repetitive.
Traveling, setting up and taking down displays can cause fatigue. Display equipment can become costly.
You must overcome the image of the fair as being a flea market where people give little respect to established prices.
Since you come in direct contact with the buyer, you may have to cope with negative feedback.
What to Look for. . .
Before entering any fair, find out about the fair. Do this by talking to someone who has exhibited there before, by visiting it yourself, or by questioning the organizers. Ask yourself these questions:
Does your work complement others in the fair? Is it compatible? You would not want to sell items costing $50 while others are selling lesser-priced items.
How many craftsmen will exhibit, and how many others will be selling the same product you are selling?
How many people are expected to attend? How many attended last year? Are there any other events that conflict?
How much publicity does the fair get and what kind? Do the organizers pay for any advertisement? Relying on free publicity isn't very effective.
Is the fair juried? If a fair isn't juried, you may be surrounded by flea market-type crafts.
How big are the booth spaces? Can you set up your display in that amount of space, or do you have to obtain new display equipment?
What types of people are attracted to the fair? Do they or will they spend money at the fair?
What other activities are being held at the same time? Can you compete with a carnival or an antique car show?
How much does it cost to enter the fair? Do you pay a flat fee, or do you pay a commission on the amount you sell?
How far do you have to travel? How much will it cost to spend the night?
Is the fair indoors or outside? If outside, will bad weather ruin your craft items or display?
Do you have the time to build up your inventory? If you attend shows too frequently, you may not have time to make more items for upcoming fairs.
How many years has the fair been held? New fairs need a lot of publicity to attract customers.
Do you have the proper licenses to sell at fairs? A sales tax permit is a must for anyone selling to the public. You will be required to collect and report sales tax on the items you sell.
Do you have to man the booth personally, or can you send a representative? Some fairs require that the maker must be at the fair.
If desired, is demonstrating allowed? Usually, it is encouraged. Are electrical needs available for equipment?
Are electrical outlets available for extra lighting, etc.? Is there an extra cost?
Is there security? Can you leave your booth set up overnight?
Do you have the necessary supplies - bags, sales slips, moneybag, price tags, etc.?
Will you need help at the fair? If you do it by yourself, will fair officials watch your booth on occasion?
If you do not do well at one fair and your product is good, keep trying until you find the locations and clientele that are best for your product.
Other Considerations
Be sure to take plenty of merchandise. A good rule is to take twice what you expect to sell. Your products should vary in price from a few dollars to more expensive items. Although you may specialize in expensive, one-of-a-kind items, develop a less expensive item(s) that will appeal to more people. They will help sell the more expensive ones.
It's best to have a helper as it may be hectic at times. Also, there will always be someone there when one of you needs to leave for some reason.
Create a professional image by being well groomed and appropriately dressed. Many sellers wear special costumes in keeping with their total display or line of goods. Have business cards and brochures to promote your business.
Even if you hate to sell, remember that is what you're there for. Salesmanship involves looking people squarely in the eye, smiling at them, talking to them. Above all, don't sit around reading a book or looking bored.
Be prepared to handle any and all questions that may arise, from "Do you sell on consignment?" to "Can you make it in blue, instead of red?" and "How soon can you deliver twelve dozen?"
Try to demonstrate your craft. People who demonstrate at a fair usually outsell those who don't.
Create an attractive display.
Brace yourself for negative feedback from critical people who do not appreciate fine craftsmanship. It's part of the business, and one of the few disadvantages of direct selling you must learn to accept. Listen carefully to your critics to get new ideas on how to improve your work or make it more salable.
If you take a check for merchandise, be sure
to ask for identification and note the individual's driver's license on
the check. Also get their telephone number and address, if it's not printed
on the check. Don't cash checks for anyone, and don't let them write a
check for an amount larger than the purchase, requiring you to give change.
To protect the checks you do have, endorse them on the spot,
"For deposit only."
When customers pay with cash, never put a large bill into your cash box until change has been given. Don't give them an opportunity to say, " But I gave you a twenty, not a ten." Prove the fact by showing them the original bill, still lying on top of your cashbox.
If you decide to accept credit cards, arrange with a local bank to obtain a merchant number and the necessary equipment. Unless you can get special compensation, each charge you accept will cost you a small percentage of the total. This charge is tax deductible as it is an expense of operating your business. You must decide whether it is better to "lose" the percentage than lose the sale. The best advice is to incorporate this cost into your pricing formula as an overhead expense.
Remember to keep accurate records of all other expenses incurred in preparing for and attending the fair, since most are tax deductible. Include your mileage by writing down your odometer reading before you leave and noting it when you return. You should also keep a record of meals and lodging and all other expenses.
Record keeping is a very important tool to determine which fairs were profitable. A small businessman will not continue an activity that is not profitable. Keep detailed records of how much and what sells and the expenses (including fees) as well as time you spent. If the fair is not profitable, drop it.
Wholesaling
Wholesaling is a fairly simple and straight forward way of selling your product. You avoid having to deal with the general public in that you sell straight to store owners. You get less for your product but you avoid marketing expenses, collecting sales tax and are able to move a lot of product quickly. You have probably heard the term "make it up in volume".
One way to approach the wholesale / retail market is to produce a simple and easy to make design and then wholesale this line of products. By doing this you can move a lot of nice pieces and get your product noticed. However, the nicer designs would have to come straight from you. Put your company name and phone number on each item that you wholesale as your trademark. People will admire your work and will in many cases be willing to pay you to do custom designs etc.. Take all of your more complex and time consuming designs and retail them through craft shows, fairs and nice flea markets. If you spent twice the time on a particular design, you deserve to be paid for it.
It would be to your advantage to make up a brochure with some photos of your product and your prices on it. Stress all of the differences between your product and cheaper ones besides the obvious. Owners need this type of information in order to develop a marketing strategy for reselling your work. The more they sell the more they will buy. The nicest thing about Stained Glass pieces is that they will sell themselves. They are beautiful and unique.
In pricing your work on a wholesale level, keep in mind that owners normally like to achieve a 33% to a 50% markup on their products if possible. Remember, every square foot of their store has to support itself. With this in mind, a piece with a retail value of $90 would probably wholesale out at $45 - $60. If your cost is $8 that would be a nice profit, especially if you could move 5 - 10 at a time.
Selling your work through Consignment Shops
Selling your work through consignment shops will bring you more for your product than wholesaling but less than if you sell it yourself. Shop owners typically get 20% of each sale. Another advantage is you don't have to advertise and your don't have to collect sales tax. The major disadvantage is that you have no control over the marketing of your work. It would be better to wholesale a piece than to have it sit in a shop for 2 months.
Pick the nicest shops and place some of your work there. Check around and see if any other stores take consignments. (garden shops, lawn and garden centers,curio shops, etc..) If your work is not moving at one shop, move it to another. Eventually you will find the stores that can move your work in a timely manner. It may even be worth paying more to a shop that has great exposure like a mall store.
Summary
First, I would recommend making a line of simple design mosaic pieces for wholesaling. Also, keep brochures and samples with you. Find some stores that can move your product and keep them supplied.
Second, I would keep the nicer pieces and take them to craft shows, flea markets and special events. All you have to pay for is the booth and you should get tremendous exposure.
Third, I would place a mix at some nice consignment shops and see what happens.
After a few months of selling, you will more than likely establish the best way to move your work in your area. It also makes a difference how much you can produce. If you are making 3 mosaic pieces a week you probably would not want to wholesale merely because you couldn't supply what a store might need. In that case you could stock pile inventory and once a month go to a craft fair or flea market and move your product. Pass out cards everywhere you go.
Good luck in your endeavors. If you
have any questions, please feel free to call me at 850-934-3157
Formula for Acrylicrete (high strength cement mix for stepping stones) This formula should not be used for grouting mosaic. It is used when actually pouring the entire stepping stone into a mold with the glass at the bottom.
Ingredients:
-White Portland Cement - available at some
hardware stores & bldg supply stores
-Medium or Course White Sand - widely available
-Acrylic Polymer Emulsion (also called Acrylic
Admixture) - available at some hardware stores or can be shipped from the
following companies
Kover Krete - Key Bond Admixture -
1-407-481-2214
Super-tek - Super-Crete Acrylic Admixture
- 1-718-278-7900
Charger Corporation - Plas-Tex - 1-800-922-4623
Lowes/Home Depot - Concrete Fortifier
(acrylic)
- Calcium Chloride (cement accelerator) -
Kover Krete, Air products Chemicals, and some hardware stores carry this.
Its accelerates the set time of concrete or cement.
- Color - (red, yellow, blue) Kover Krete
sells almost every color you can imagine. Also, many hardware stores carry
both liquid and powdered coloring.
Approximate cost:
White Portland Cement - $15.00 - $23.00 per
94 lb bag
Sand - $2.00 - $5.00 per 100 lb bag
Acrylic Admixture - $40 - $60 per 5 gallon
pail or $10 - $18 per gallon
Calcium Chloride - $4.00 - $8.00 per 8 lb
bucket (takes very little per batch)
Color - $13.00 per quart ( most colors go
a long, long way)
* 5 gallons of acrylic can treat approximately 300 lbs of cement mix. Thus your per pound cost of mixed and colored cement would be approximately 20 - 25 cents. (diamondcrete runs about $1.50 per pound)
Mixing Instructions:
-1 part White portland Cement - scoop as much as you think you will need into a 5 gallon bucket. I use 6 - 8 cups.
-2 parts Sand - Mix into the portland cement. If you used 4 cups of cement, put in 8 cups of sand.
-Replace the water required in mixing cement with Acrylic Admixture or at least replace most of your water with Acrylic. The more Acrylic the stronger the stone. You can go 50/50 or 75/25 etc... (note - Acrylic slows the set time but Calcium Chloride speeds the set time back up.) Acrylic gives you a denser stone with tremendous strength and more flex (crack resistance) than standard cement. It also waterproofs the stone.
-Mix with a drill driven cement/paint mixer until creamy like pancake batter. Press out the lumps as you mix with a potato masher (kitchen tool).
-Mix in your color. Add a small amount and mix well. Repeat until the desired color is achieved. Red and Blue make plum, Yellow and Blue make green, Red and yellow make orange and so on. With this formula, your colors should come out extremely uniform and smooth.
-COMPLETELY Dissolve 1 ounce of Dry Calcium Chloride into a small amount of water and add to the mix. (not so much water as to dillute your mix. Just enough to dissolve the accelerator) Stir at least another minute. The more Accelerator (calcium chloride) you add the faster your mix will set. The slower the mix sets the stronger it will ultimately be so do not overdo it. If you want it to set in 45 minutes it will but I would recommend a 2 - 3 hour set time. Just experiment until you are satisfied. 1 ounce should give you a 2 - 3 hour set time depending on the temperature. The accelerator will come with instructions.
-Once the mix is thoroughly blended you are ready to pour. Once you pour, be careful not to move or shake the mold or you may allow cement to go under your glass and bury it. Do not attempt to pop the stone out of the mold until it is hard to the touch. If the cement feels soft and pliable let it set longer and just add a little more accelerator next batch. When in doubt, wait longer.
** You can shorten the mixing process by mixing your color and accelerator into the acrylic before you add it to the cement. Put the color in first and right before you add it to the cement dissolve in the accelerator. The liquid may start to get warm but do not be alarmed, it is supposed to.
Tip : once you have poured the cement into your mold, vibrate out air bubbles with a hand type vibrator. (1 - 2 minutes) This will greatly strengthen your finished product.
Also, experiment with a few small batches
of cement. Make a few trivets or coasters with scrap glass. When
you are satisfied with the results and confident about set time, begin
using the mix for the real thing.
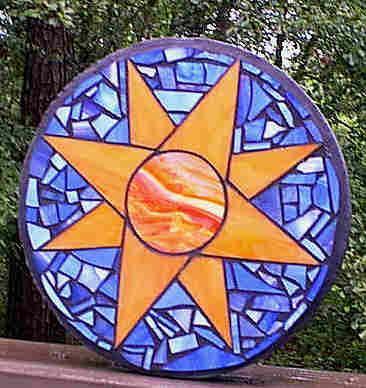
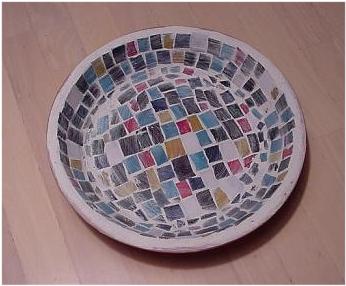
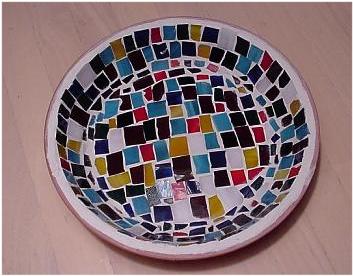
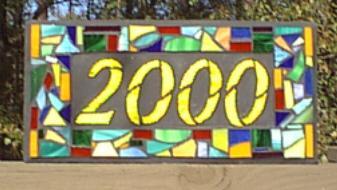
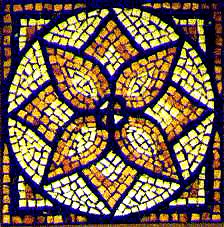
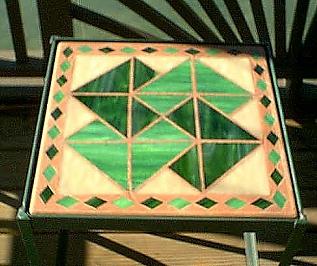
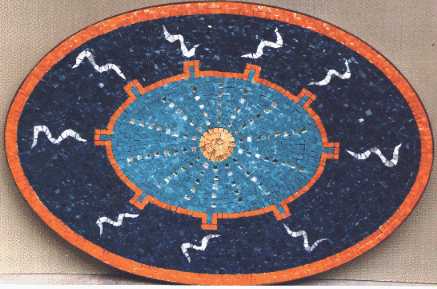
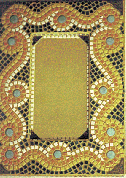
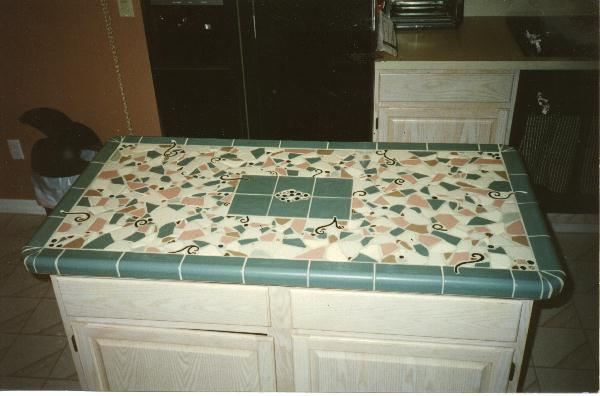
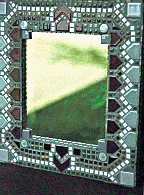
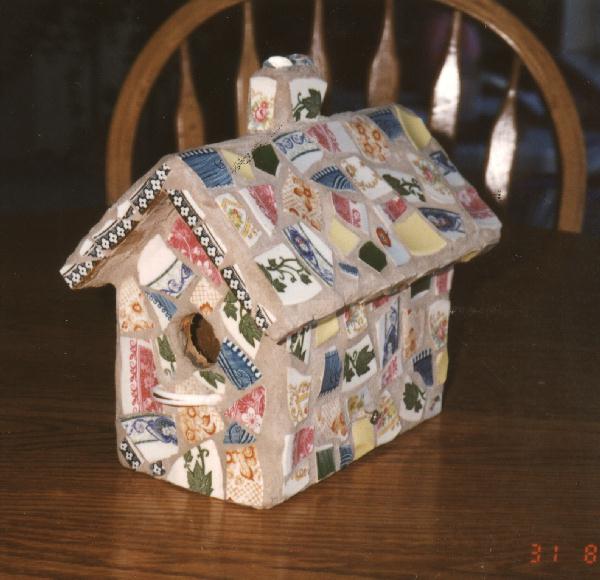
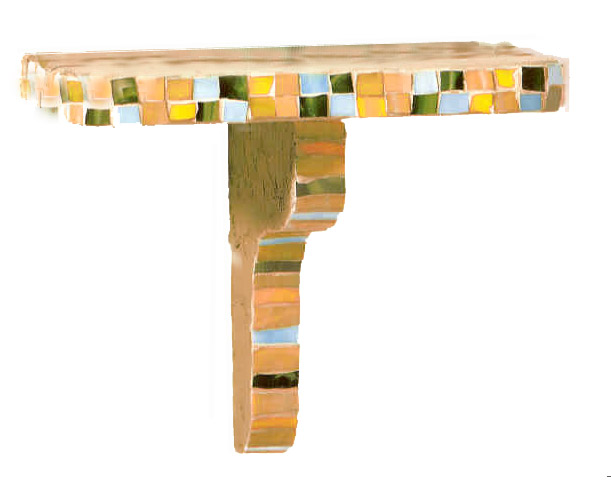
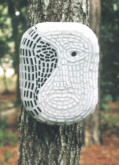
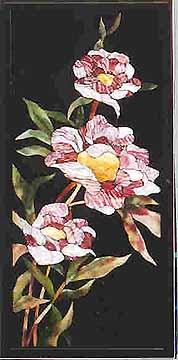
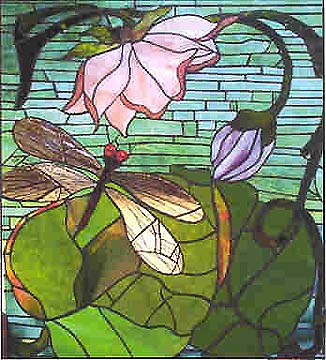
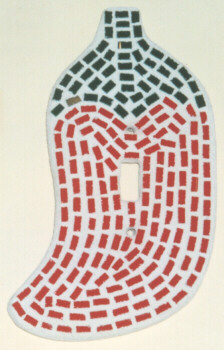
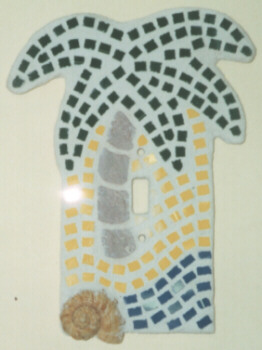
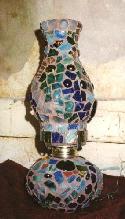
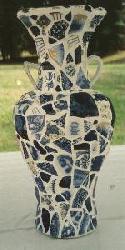
SAMPLE PROJECTS
 |
 |
  |
 |
 |
 |
 |
 |
 |
 |
 |
 |
 |
 |
   |
   |
   |
Privacy Policy - Third Party Advertising Google, one of our third-party advertisers, may add a cookie to determine targeted advertisements based on your preferences and your visit to our site and other sites on the internet. You can choose to opt out of Googles use of cookies by visiting the Google ad and content network privacy policy.