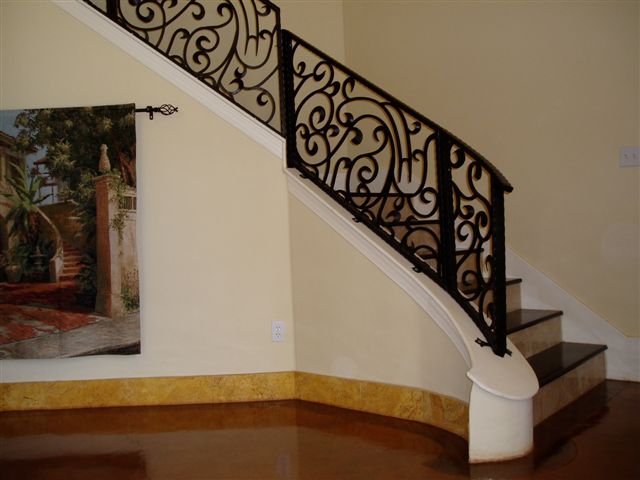
Making your own Ornamental Stair or Deck Railing - Practicing Welding
Once you have purchased a wire feed or MIG welder, a side grinder, a chop saw and have acquired some scrap metal you are almost ready to practice. I say almost because there are a few more items you will need before you can SAFELY weld.
These are as follows:
1. A welders helmet. I use the kind that automatically turn dark when they detect an arc. Available at harbor freight.
2. Welders Gloves and a Vest if desired. The gloves are mandatory. The vest will protect you from sparks and is recommended. By all means always wear long sleeves, long pants and shoes when welding.
3. Safety Goggles. Also available at Harbor Freight or Sears. These protect your eyes when grinding. Do not ever grind or cut metal without wearing them.
This list may not be all inclusive.
Follow all of the MIG welder manufacturers safety recomendations. If you follow the safety procedures and wear the right protective gear then welding is not that dangerous. If you do not wear protective gear and do not follow safety instructions then it is not safe.
After you have all of your equipment you are ready to make some practice welds. Old bed rails make excellent practice pieces and can even be used to create some useful items. Buy and angle type protractor or a speed square so you can mark angles on your pieces. Cut 4 - 45 degree angled pieces of rail and lay them out to form a square of a rectangle. To make a square they must obviously be the same length.
You are now ready to weld them together. You should have already read the instructions that came with your welder and should have already purchased and installed either a flux core wire or a standard wire. If using a standard non flux wire you will need the gas bottle that provides a shield. Instructions on all of this will be with your welder.
Before making your weld, make sure the pieces are tight together. Large gaps make weaker welds. Turn your welder on, adjust the gas as per the manufacturers instructions, put your helmet and gloves on, and place the tip of the gun near the piece to be welded. On my welder I would let about a half inch of wire come out of the gun first and then I would place the tip of that wire at the beginning of where I was going to start my weld and squeeze the trigger. You will see through the welders helmet that the wire as it is welding forms a little puddle of molten metal. Slowly work the tip along the seam you are welding. You would normally weld both sides. In the case of making a square out of bed rails I would weld all four corners and then flip the square over and weld the other sides. Another thing you can do is create little tack welds in a couple of spots on each corner. You do this in situtations where you may want to break a weld and reposition a piece. I will sometimes hold two metal pieces tightly together and do a couple of tack welds. Then I can work with the piece without having to continue holding it together since the tacks now do that.
Make squares, add legs to your square, make triangles, etc.. Anything you want. Practice cutting various angles with your chop saw as if you were going to create angled railing for going up stairs. Add a handle to your welding cart, make a welding table out of angle iron, casters and wood. After a day of practicing you will be ready to start on some basic rectangular ornamental railing.
An index to more articles on this subject is below. Articles and more pictures will be added periodically.
Steve Cole
Ornamental Rail Welding Articles
Making your own ornamental railing. -Introduction to How to make your own Wrought Iron type Ornamental Railing.
Making your own ornamental railing. - Practicing Welding