Your model should be relatively flat like a stepping stone but besides that one constraint it can be as fancy and ornate as you want. As a rule of thumb, if laid down flat, the peak of your model should not exceed 4 inches and the bottom should be relatively flat. Remember that you will be sealing the bottom of your model with clay or silicone later to keep the liquid rubber from seaping underneath it. Choose your model with this in mind. For example, a relatively flat river stone could be used as long as you are able to lay it on a flat surface and go around the base with modeling clay or silicone thus sealing it to your baseboard. The rest of the stone need not be flat. The bench part of a garden bench would be a good model. You will note that many of these benches have what is called an "undercut" where the edge of the bench curves out and then in again. With a hard plastic mold you would never get the casting out once it hardened. However, because the material we will be using is much more flexible this will not be a problem.
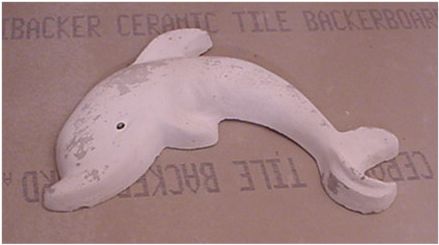
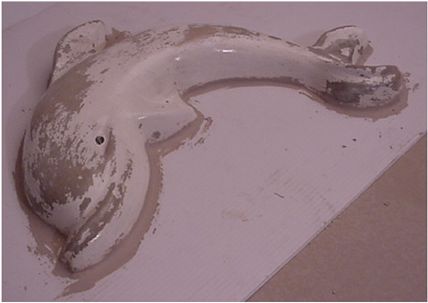
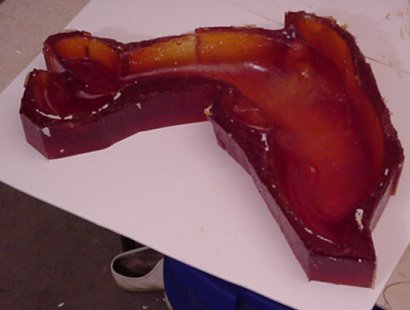
For our demonstration model I
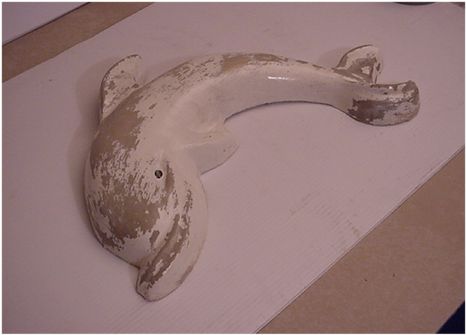
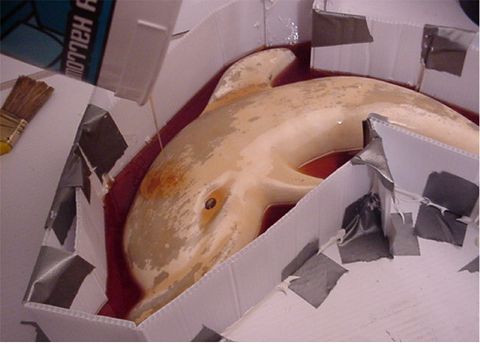
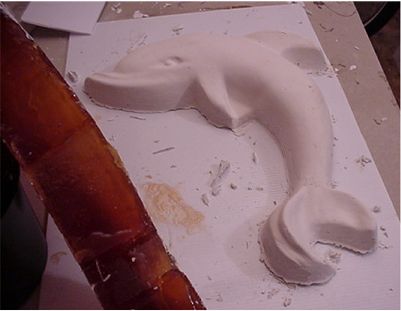
chose a cement dolphin that belonged to my grandfather. It is about
50 years old. I will use the mold to make replicas for my brothers
and sister. The dolphin sits about 3 inches tall off the baseboard
and is about 18 inches long. It has no undercuts and should make
for an easy to use mold.
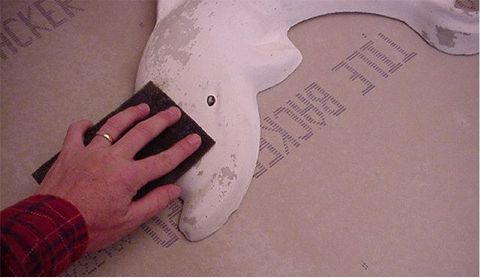
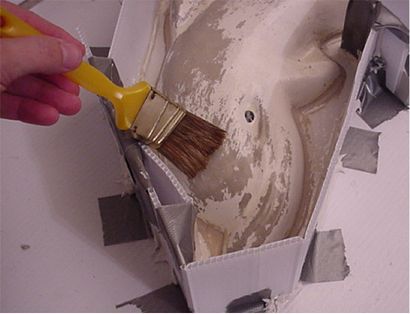
Once you have chosen your model you will need to clean it and sand away any loose paint or rough edges that you don't want in your reproductions. Any defects in your model will carry over to your mold and then to your reproductions. If there are any chips or damaged areas you can fill them with clay or putty after you have sealed the model. (The clay has a tendency to stick better on a sealed surface.) The dolphin pictured below had to be sanded to remove loose paint and after it was sealed with acrylic the chipped areas were filled with clay and then resealed with acrylic.
Sealing your model, fixing chips and attaching it to the baseboard
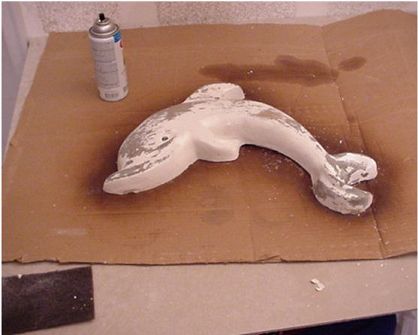
If you are using a model that is made of clay, cement, or any other pourous material you will need to seal it with an acrylic or polyurethane clearcoat. In the example below we used "krylon clear acrylic". Several coats were used on the dolphin to try and smooth out the surface.
As previously stated, any chips can be filled in with clay or putty. After the clay in the chipped areas dries those areas should be sealed again.
Once the imperfections are repaired and the model is resealed it can be placed on the baseboard. If the model is heavy enough there is no need to glue it down. If it is light you will want to glue it to the baseboard using a silicon adhesive. If your model will float then you definately want to secure it otherwise when you pour you molding compound the model will float to the surface.
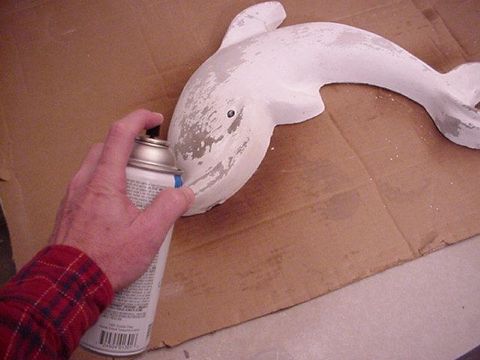
Seal the model with an acrylic clearcoat.
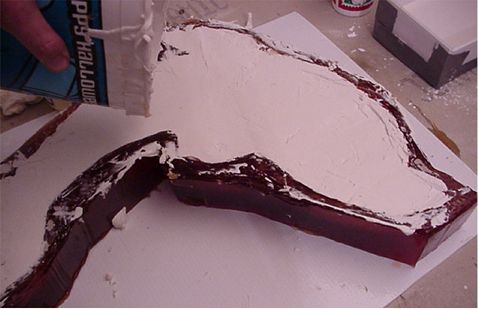
Sealing the bottom edges of your Model
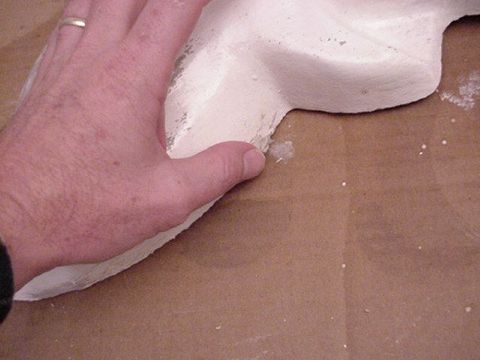
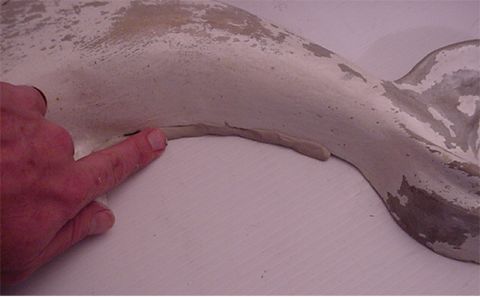
After you have placed your model on the baseboard you will need to seal the bottom edge with either modeling clay or silicon. In this example I used modeling clay but I recommend using silicon if possible. The clay has a tendancy to form hairline cracks. Sealing the bottom of the model will prevent the liquid rubber from seaping under the edges and encapsulating the model. After the clay or silicone sets spray it with a coat of acrylic to seal it.
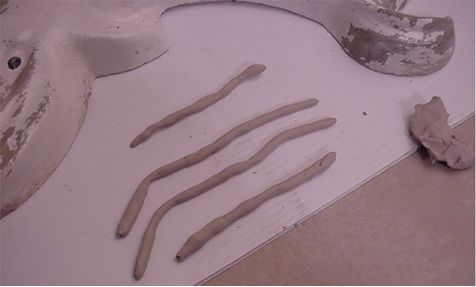
Make rolls of clay (or you can use silicone
caulk and a caulk gun)
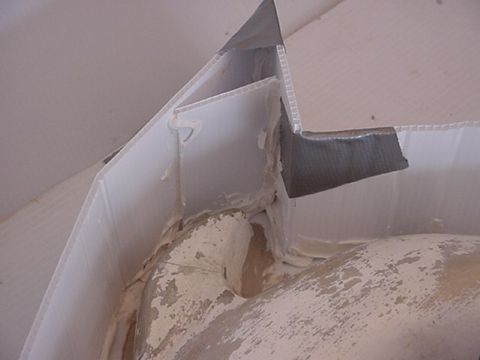
Building your Containment Frame
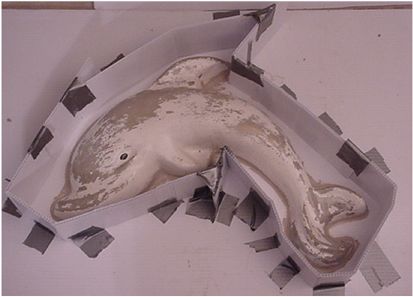
Although it sounds intimidating a containment frame is really very simple. In fact , if you were reproducing a 6 inch round and flat object you could use an 8 inch round stepping stone mold as your containment frame. The frame is simply there to keep the liquid rubber where it belongs until it can set. The two goals are to make it waterproof so the liquid rubber does not escape and to make it conform to your model so you don't waste expensive liquid rubber filling voids that don't really need to be filled. If you are using urethane and do not want to use a mother mold like in this example, you need to have the walls of the containment frame about an inch away from the model so the finished mold has walls about an inch thick. This way the finished flexible rubber mold will have enough strength to hold the casting cement without bowing and distorting the finished casting therefore eliminating the need for a mother mold.
You can use a plywood board as the base and strips of cut plywood, thick linoleum, corrugated cardboard or coreplast as the walls. (there are many other materials you could use but these are the main ones) For my example I chose to use corugated plastic which runs about $20 for a 4 x 8 foot sheet. It is waterproof and easy to cut and bend. All sign shops carry this material and can sell you a sheet. I highly recommend it. Before building the containment walls you will need to measure the height of the model.
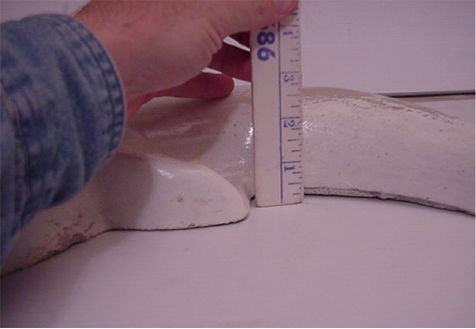
Measure the model to determine how tall your
containment walls must be.
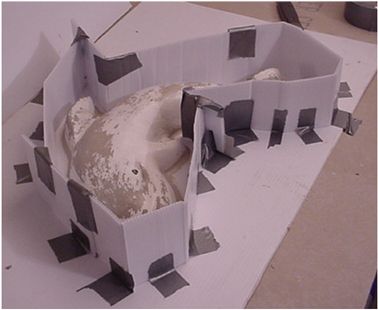
Build your walls. (cut the coreplast with
the flutes vertical so it can be easily bent)

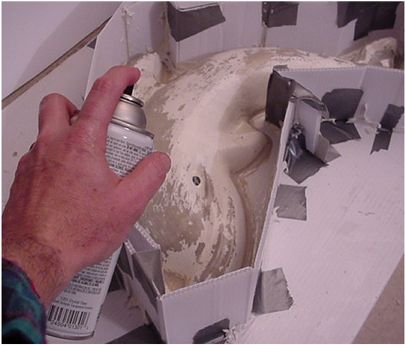
Applying a release agent
Once your model is in place and the walls are built and sealed, a release agent is applied to the model and containment walls to keep the molding compound from sticking and to allow the model to be removed from the new mold once it has set up. There are several good release agents available. You can also use vaseline which has been heated up to liquify it. Just brush it on. Use a hair dryer to smooth our any vaseline that starts to harden. A mix of 10% castor oil and 90% alcohol can also be used.
You can brush on a release agent.
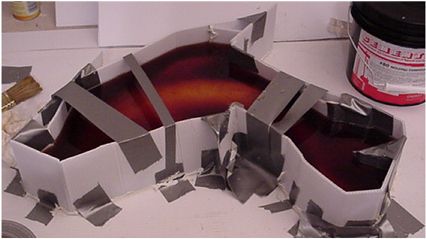
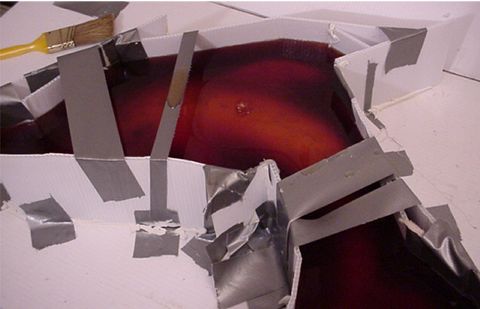
Mixing your rubber or urethane molding compound
If you are using a two part molding compound you will need to mix enough to fill your containment frame and cover your model. I always mix a little less than I need and then mix another batch to finish. That way I keep from mixing too much. Make sure you mix the two components very well. You can use any plastic container.
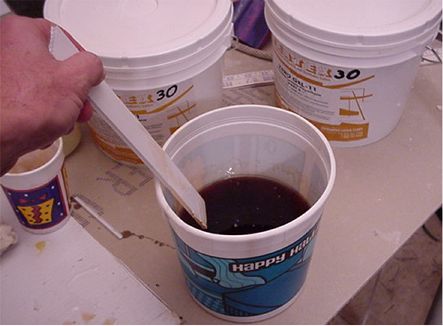
Mix your urethane well
Pouring the molding compound
Slowly pour the mixed molding compound over the model until there is about 1/2 inch of compound over the peak of the model. As you pour check the bottom of the containment walls for leaks. If you find leaks seal them with silicone and hurricane tape. Since urethane begins to thicken immediately after it is mixed the leaks will seal themselves after about 10 minutes.
Pour molding compound slowly over the model
& check for leaks
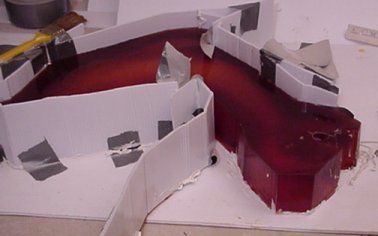
Allowing the compound to set
Liquid urethane takes about 24 hours to fully set before demolding the model. Give it the full 24 hours.
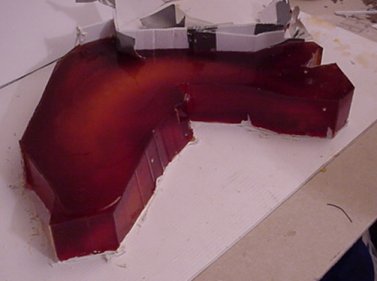
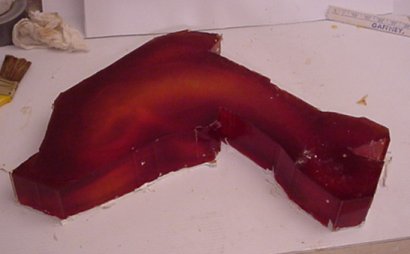
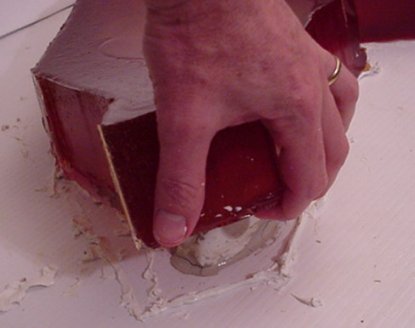
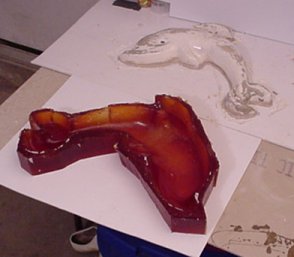
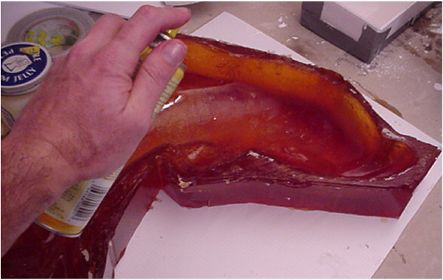
Demolding
After the full 24 hours has elapsed you can begin carefully removing the outer walls of your containment system. Once the walls are removed work from one end of the new mold and gently lift it up from the model. Work you fingers along the bottom edge and gently go from one end to the other until the mold is detached. Be careful not to damage the mold with your fingernails. After the mold is removed you should let it sit undisturbed for a few hours and then it should be safe to clean the inside out. Sometimes paint can stick to the interior of the mold. This can be gently removed with a fingernail. Once all foreign material is removed the mold can be washed out with water.
Remove the outer walls
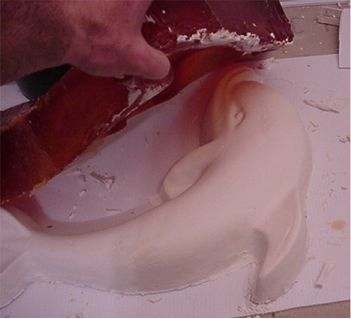
Making a casting using the new mold
It is best to let the new mold sit for another 24 hours before using it for a casting. To use the mold simply spray the inside with a mold release agent, fill it with either cement or plaster, let the casting material set up and remove it from the new mold.
Demolding the casting
To remove the newly created casting from your mold flip the mold with the casting in it over and pull the edges of the mold away from the casting. Work your fingers all the way around the mold until the casting frees itself.
Privacy Policy - Third Party Advertising Google, one of our third-party advertisers, may add a cookie to determine targeted advertisements based on your preferences and your visit to our site and other sites on the internet. You can choose to opt out of Googles use of cookies by visiting the Google ad and content network privacy policy.